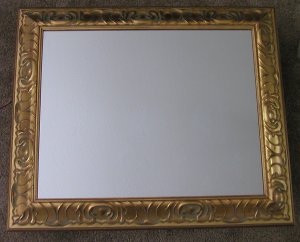
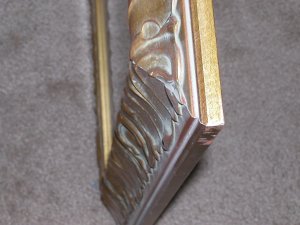
Find your frame first, as this will determine most of the other dimensions. I got lucky and found a baroque wooden frame on a clearance table at an arts and crafts store. If you can't find a suitable frame cheaply, you can try to make your own, but that's beyond the scope of this article. A good frame for this effect is thick, since a thick frame will help disguise the depth of the box.
The frame I found was also beveled quite a bit, which further reduced the apparent depth of the box.
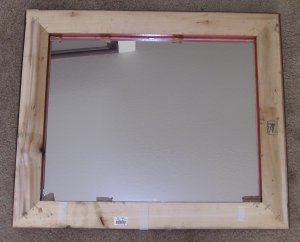
Turn the frame over and measure the inside portion. The width and height of your effects box should fit tightly inside the recess. Determine the width and height for the mirror and the box.
Determine how deep you want the box to be. It should be just deep enough to hold your ghost effect, but no deeper. An obviously deep box will spoil the illusion. I bought a plywood plank that was the width I needed for the box's depth. This saved a lot of cutting. The thickness of my plank was 3/4-inch. You can use thinner wood, but then you might have to make more complicated joints at the corners.
Cut the plank into the four sides for the box. If the width of your box is w, then the top and bottom pieces should be cut to a length of w. If the height of your box is h, then you should cut the side pieces to a length of h - 2t, where t is the thickness of your plank. It's the outer dimension of box that's important.
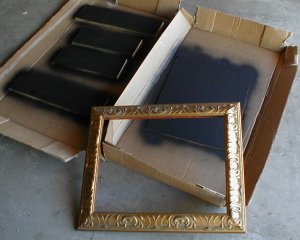
Cut the pressboard into a rectangle the size of your box. I used thin pressboard, because I didn't want to add unecessary depth to the box.
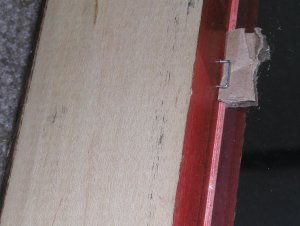
Also cut a strip that will act as a bezel to block the light bulbs and wiring from direct view. (You can see an image of this strip further down.
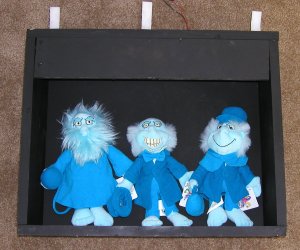
Paint all of the wood flat black. Use at least two coats to get good coverage. It's important that it really absorbs as much light as possible.
While the paint is drying, make the mirror. Start with a piece of rectangular glass. I suggest you buy the glass at a home improvement store and let them cut it to size. They will probably put masking tape on the cut edges, as they're likely to be very sharp. Keep the masking tape on until you're ready to apply the tinting material. When you remove the tape, make sure you wear good work gloves to avoid cuts and splinters.
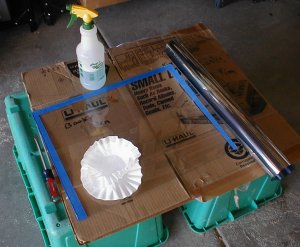
Follow the directions that comes with the tinting material to apply it to the glass. Get a friend to help; the extra pair of hands is nearly essential. You'll need a spray bottle to apply the wetting solution (use it liberally). You'll also want to use a squeegee to work the air bubbles out. When the adhesive on the tinting material sets, use a knife to trim the edges.
I attached the glass to the frame by using a staple gun to place staples near the edges of the glass. I then wedged little bits of cardboard to hold it securely. The tinted side should be toward the inside of the box.
By now the paint should be dry and you can assemble the box. First do a test fit by placing the sides into position and slipping the frame over them. I assembled the box with wood screws, but you can use glue and nails if you prefer. I used small finishing nails to tack the pressboard back to the box. You may choose to attach the bezel strip after the wiring step.
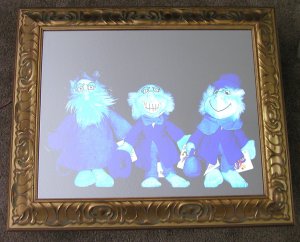
I decided to light the ghosts from above, so I bolted a couple battery holders inside the box at the top. I also mounted a couple flashlight bulb sockets to the light bezel. You will probably want to experiment with the number of batteries and light bulbs under the actual lighting conditions you will use. If the lights aren't bright enough, you won't see the ghosts. If they're too bright, the effect looks hokey.
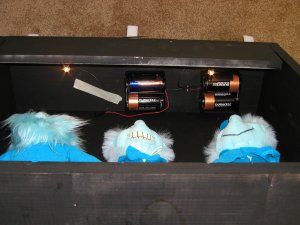
Step by step wiring: Connect the positive (+) terminal of the first battery pack A to the negative (-) terminal of pack B. Connect the positive (+) terminal of pack B to one side of socket A. Connect the other terminal to one on socket B. Run a wire from the other terminal on socket B out of the box to the pushbutton. Run a wire from the other terminal of the pushbutton back into the box and to the remaining terminal on battery pack A. Install batteries and light bulbs and test the circuit by pressing the pushbutton and verifying that the lights illuminate.
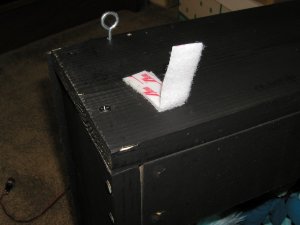
If all is well, the frame should slip tightly over the front of the box. For extra security, use self-adhesive hook-and-loop (e.g., Velcro) strips to hold the frame to the box. This allows you to remove the mirror later to change out the ghosts or replace dead batteries and light bulbs. I also used Velcro to hold the ghosts in place.
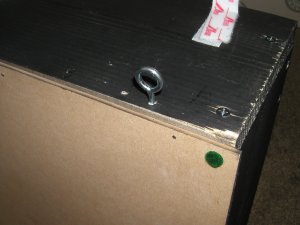
Put two eyelets at the top of the box near the back to hang the mirror on a wall. The entire contraption is heavy, so it's best to hang it from the wall studs rather than the dry wall. Plan ahead and space the eyelets 16 inches apart — that's the normal spacing between studs. If you cannot hit the studs where you want to hang the mirror, make sure you use heavy-duty toggle bolts or anchors. Little felt circles can be stuck to the back to avoid scratching the wall.